Sunday, August 31, 2014

Bleacher seat covers

My son just started football, we watched his first game a couple weeks ago and froze our rear ends on the cold steel bleachers. So. I went shopping with visions of  hip, portable seat cushions. I bought some foam and made envelope style pillow covers each with its own handle and my pieced my sons number onto the front panel. I am quite proud of how they turned out. I got to try them out at the following game and for once felt like an organized, on time, got it together kinda parent- This is a rare feeling for me- So I embraced it and enjoyed the game much more while my tush was nice and toasty. Love the wool herringbone- all of the fabrics I happened to use for this project were thrift-ed at different times. I used the same denim for all the numbers- one of which I used the reverse side of the denim as it would not have contrasted enough otherwise- and the same denim for the overlapping envelope backs. I played around with a doodle for the numbers- and discovered that you can piece anything, especially if you keep it simple and keep your lines straight. I broke down each number into a few different parts- you can see where it has been pieced- This could be done the same way with letters too. Our team lost 20 nothing....Better luck next time- They might just make a football fan of me yet. I do not understand the game yet or know the rules, but still found myself standing and cheering uncontrollably at one point- I had fun. My,It is a busy season- as Mr.man practices 4 nights a week for 3 hrs and then has a practice before the game, making it 5 nights a week in total that he has football. It is the first sport he has shown any interest in. So. We were happy to do it, in spite of the insanity it adds to the week. Good times. Oh summer, I will miss you, It seems you were not with us long enough this year. School starts tomorrow. I am not sure whether to laugh or cry....

My sewing space in full swing

This is what my space looks like in the middle of a quilt, fabric everywhere, floor covered in thread, i sweep up at the end of the day, most of the time.. This is where i do my cutting and sewing. I refinished this table myself, i had not intended to use it as a sewing table, it was suppose to be temporary, but over time i have grown quite fond of this set up, it is a pub style table and has been lowered ever so slightly, i do not have to hunch over to sew, which makes bigger projects much easier on my back. I have a drop leaf table that is on wheels that I can slide out from under the table to be used for cutting and sometimes i stretch my quilt backing over it with clamps and lar my quilt batting and top and spray baste or pin. My other sewing machine is tucked away in the storage cupboard that is contained ubder this table top. The dresser was also a project of mine, it was given to me, i painted and distressed it a bit and added the glass pulls and use it to store my fabric. Inside the fabric is folded up to a consistent size and filed on its side, so everything is visible at a glance. The end table that i have next to the dresser stores my ufo, s that I intend to complete at some point....... I also painted a peg board and hang all of my rulers, templates, patterns and cutting tools etc. I keep Grannies thread and other haberdashery in a decorative cupboard that i open every now and then and look through the shiny silk threads that i use sparingly to quilt the odd item that i plan to keep for myself. I can feel her with me in these moments and can feel her smiling. This is my favorite space in the house. Sewing is my meditation and or medication...

The fugly block

This is the cabin i pieced in the first round, i started working with the theory of lights on one side darks on the other, as you may see here, if you share my opinion, is that there may be more to this than that. I just started reading a text on practical colour theory, hope it helps me avoid further fuglies. More to come in way of update. I have made a discovery that solves this problem, i am in the middle of executing this solution, and will have pics soon that will show how i was able to take these same fabrics and mix them with my own more modern fabrics with what i am hoping is success. So far so good i have some log cabins that i am happy with , all i had to do was start using the wrong side of the fabrics that were making the addition of my fabrics impossible. I discovered that i Love these fabrics wrong side.This is probably due to the fact that i love grey and the wrong side of fabrics tends to have this neutral threaded through it. The wrong side appears more neutral which enabled me to add some nice accent colour without it being overwhelming, and it works.. i was so excited when i discovered this as it was like i immediately doubled my fabric stash in terms of colour value....more pics of the new blocks that i find pleasing, coming soon... i welcome any comment, please feel free to share any experiences you may have had with your own fugly fabric pairings and any solutions you may have discovered to make it work.

Saturday, August 30, 2014

My first quilt

This is my very first quilt, i made in the end of 2012..or possibly in 2013 ? The date on the label is covered by binding. As you can see, i lost all the points while squaring up the quilt in the end. I was so proud of its squareness that i did not fret too much about the lost points. This is why it is so important to square up each block prior to piecing. I am a bit of a perfectionist, so one would think that this quilt would disturb me beyond measure, Odd as this may be, this quilt still hangs in my living room. I find the colors to be very soothing and perhaps the fabrics are its saving grace as i still enjoy the odd glance at it. Despite its many flaws , i still enjoy it. Maybe it serves as a reminder that perfection is not my aim, even though it is something i strive for. It is a reminder that perfection is not necessary to wholeness or completion. It is a nice reminder of my progress as i can see where i have improved since then, i hope to continue improving and learning , a special thanks to all who post tutorials, to which enabled me to learn this skill in the comfort of my own home in my own time, no need for a sitter :)

Friday, August 29, 2014

LOG CABIN STAR

This is my first attempt at a log cabin quilt. I just came back from a visit with my family and my mother in law showed me all of her finished quilts and i found every one of them inspiring. Mom had also allowed me some time going through her fabric stash. I felt like a kid on Christmas morning, such a guilty pleasure :). Needless to say, when we got home, i could hardly wait to get started on my new project, practicality won when i managed to get us unpacked first. I find i require a tidy space to get my creative juices flowing, sometime the creative pocess can in itself get a bit messy but i try to atleast get started with a tidy environment. The middle of a project can look like chaos to the untrained eye :) it is organized chaos and i am okay with that, it all gets tidied up in the end..
Anyways, mom has made some amazing log cabin quilts, i have to ask her permission to share some of these beauties with the quilt world as they are perfection, she has an eye for detail that is unsurpassed , all her points and seams are perfect, not to mention her use of colour or the hand quilting, OMG, the hand quilting is simply to die for. When i first started sewing a little over a year ago, i had had no idea just how talented this incredible woman is. My appreciation for her quilts continues to grow, i am blessed to have such an amazing teacher.
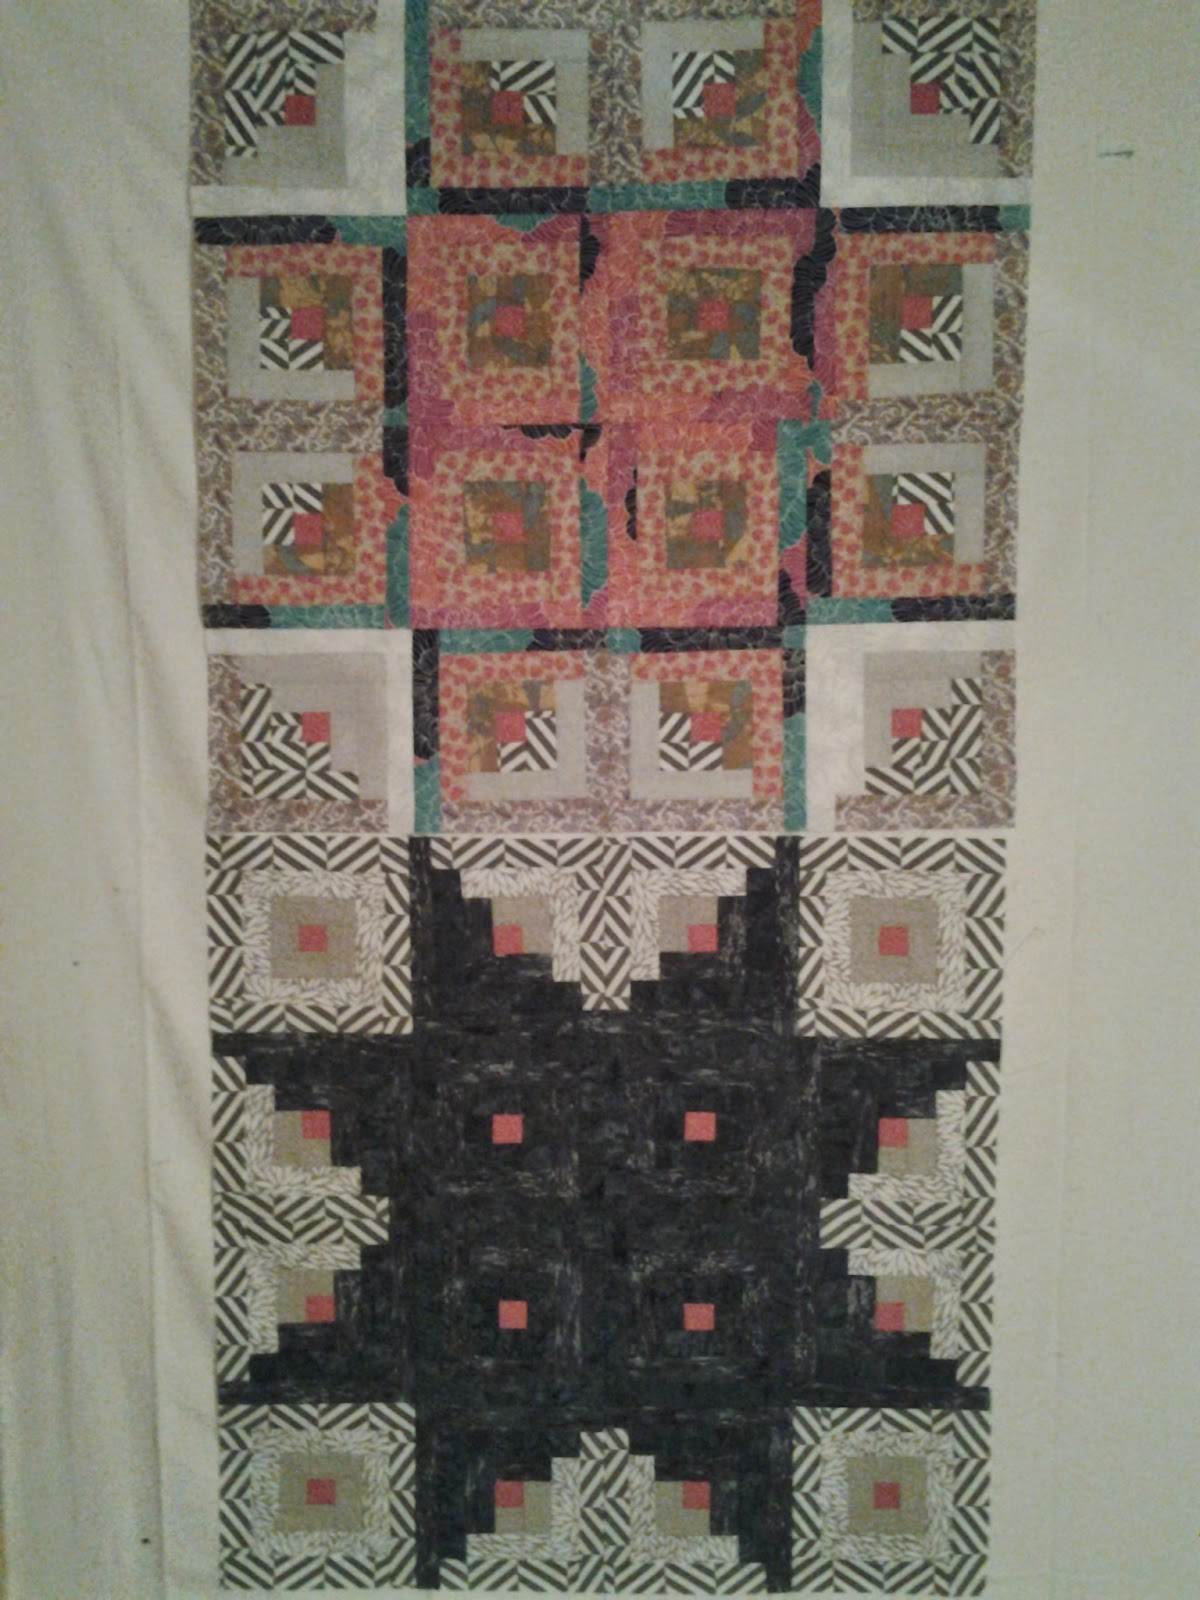
Anyway, I meant to try my hand at a light and dark log cabin quilt, where the log cabins orientation creates a dark and light diamond shapes. Mom had successfully done some really scrappy log cabins this way that i more or less fell in love with...My goal was to use all the fabrics mom had given me and anything from my own stash that would work....
So i started cutting strips at 1.5" and separated my lights and darks. Then i chain pieced 4 cabins to start. I was not pleased with the look, the fabrics just did nothing for each other, i wanted scrappy, but this was fugly looking. So i changed my colors and went to something a little safer for me- grey / white and navy, with the red center, this was way more to my liking. I chain pieced a dozen in these colors and was pleased. I hate to waste, and i still was not ready to abandon the scrappy look yet, at this point i was using more fabric from my stash, which was not the original plan. Let me just say , the fabrics i had gotten from mom are lovely, but somehow, when i pieced them together it was just wrong. Maybe, if i were to just keep piecing the fugly block would grow on me, but it is a lot of effort to make for something that was looking like it was going to be hideous. I know myself to get easily discouraged and knew how important it is to be pleased with the outcome of something i am just learning. So , the first block i finished was with my safe colours, the grey/white for the light side and the navy for the dark. Then i wanted to play around a bit with more colour and aimed for a scrappier block, again with my own fabrics i mixed it up a bit, there was not enough contrast  and i was not pleased, funny thing is, it sat on the design wall for a couple days and i started to like the low contrast in that the star shape is so subtle up close as the fabrics are so loud that the star disappears, until you stand around ten feet or more away and then the star can is easily be seen. The over all look has grown on me. Now i am unsure as to what to do as far as, Should i make one large quilt? Or make a couple baby quilts or wall hangings?
Not sure yet...
I am really proud of these blocks, it is the first project that i have used my new quarter inch foot for, and wow what a difference, this is the first time things lined up for me as well as they did. Then squaring up the cabins before piecing the blocks , really does make huge difference, i could not believe how much i had ro shave off each cabin, it all adds up...
So many cool things to do with a log cabin, chain piecing is my new bff.